How to install CDONTS on Windows 2003 Server
Torna alla pagina delle informazioni tecniche
Torna alla Home Page di Jack
Background
By default CDONTS is NOT INSTALLED on Windows 2003, but CDOSYS is. CDOSYS is an updated version of CDONTS, but more than likely you will need CDONTS for compatibility issues
This tutorial will help you install CDONTS on your Windows 2003 Server.
This tutorial will also show you how to get CDONTS working on your server, even if you have another Mail server running such as Mail EnableStep 1
Download CDONTS.DLL from here. Once you have downloaded unzip the CDONTS.DLL and put it in your c:\winnt\system32\ folder. You can also get CDONTS.dll from your windows 2000 CD.
Step 2
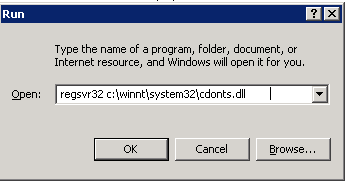
Register the CDONTS.DLL component on your server by clicking start >> run >> type :
regsvr32 c:\winnt\system32\cdonts.dll >> ENTER
Don't forget to replace winnt with your windows folder
Step 3
Now that you have registered your CDONTS.dll component we need to check your SMTP service is running. Goto Admin tools >> IIS >> and expand your local machine, if SMTP service is listed then it is installed, if SMTP is not listed, click Admin tools >> Configure your server Wizard >> click Next >> Make sure Mail Server / POP3 is installed, if its not, then install it. To install SMTP goto Configure your server Wizard and install it from there.
COMMON ERROR SMTP Is installed but not listed in Windows 2003 IIS6.0 Don't worry, this sometimes happens and is a flaw of windows 2003 To fix this error click Start >> Run >> type : regsvr32 c:\winnt\system32\inetsrv\smtpsnap.dll
Step 4
You need to decide which port you want your SMTP server to send emails from. By default the port is 25, only use 25 if you have not got another SMTP service running. If you want to use port 25 goto STEP 5. If you want to change port, we recommend to Port 17. Port 17 is currently being used for Welcome message. So we need to disable it and make SMTP use port 17. Goto C:\WINNT\system32\drivers\etc and edit the file called services in NOTEPAD
Disable the following lines by putting a # in front of them
# qotd 17/tcp quote #Quote of the day
# qotd 17/udp quote #Quote of the day
You also need to change the line
smtp 25/tcp mail #Simple Mail Transfer Protocol
to read
smtp 17/tcp mail #Simple Mail Transfer Protocol
Save changes.
Step 5
Check to see if your SMTP server is listening on your Port, if you have changed your port to 17, follow the information next, if your port is 25, then goto step 5a goto IIS and right click your SMTP service, click properties, then click Advanced
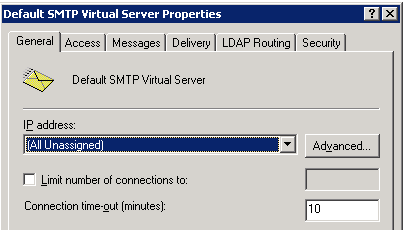
On the advanced screen, change the TCP port to 17, then click OK, OK, OK. Stop the SMTP and restart it
Step 5 A
Goto Start >> Run >> Type: CMD press enter >> in Command prompt type telnet press enter
type open yourserveriporname 25
If you are now using port 17
type open yourserveriporname 17
If that doesn't work for you try replacing yourserveriporname with localhost
open localhost 17 or 25

Then press enter. If you receive a response this means your server SMTP is working fine on your port Goto Step 6

If you don't get a request read on, you need to disable your SMTP service and add a new one, to do this goto IIS and right click default smtp service, then click New -> virtual server
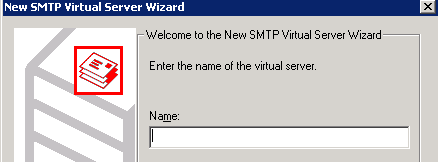
Enter a name for your SMTP server, then click next, click browse and choose your mail folder, by default it is set as c:\intetpub\mailroot
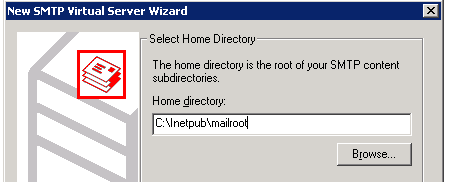
Next it will ask you for a domain for this SMTP, type localhost then click Finish, you should now see a new smtp service, you need to change the port to 17 or 25 as described above (step 5). Make sure you stop the default SMTP service Right Click >> Stop, then start the new smtp. Right click >> Start. Once you have done this, you should now be able to Telnet into your port, go back to step 5A
Step 6
Now that your SMTP is installed and you can telnet into the port, you need to setup the security. The following will set security so that only the domain names on IIS or localhost can send emails using CDONTS, in other words only websites hosted by this server can send CDONTS formatted emails using ASP
Goto IIS >> Right click your working SMTP server, click Properties, click ACCESS

The click Authentication,
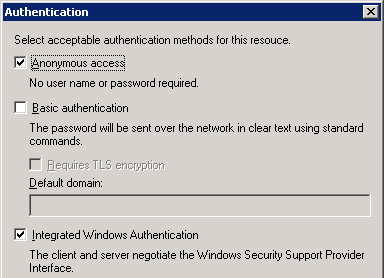
Put a tick inside and inside Anonymous Access and Integrated Windows Authentication
Click OK, then click CONNECTION
You now need to set it so your machine has access to the connection
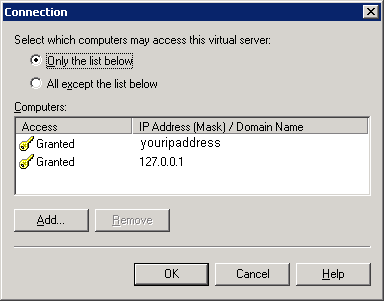
Set the same inside the RELAY window then click OK, once you have given your machine access to relay and access to the connection, we need to make sure it can deliver the email. Click the DELIVERY tab, then click ADVANCED
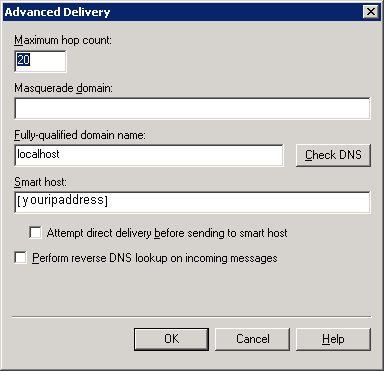
Set the MAX hop count to whatever you like, but we recommend at least 20, Enter either your FQDN or localhost, then enter your servers IP address under Smart Host, make sure you put it in [brackets] for some reason it works fasterCongratulations CDONTS should now be working!!
If CDONTS is not working read on
If CDONTS is not working for you, you will need to disable 8bit mine as it is enabled by default in exchange. To disable 8bitmime, click here http://support.microsoft.com/default.aspx?kbid=262168Last Updated Wednesday 3rd December 2003
Torna alla pagina delle informazioni tecniche
Torna alla Home Page di Jack
(C) 2003-2025 Jack Mauro - electro.it


